Elections Today
- Pennsylvania
Recent Projections
| State | Candidate | Delegates |
|---|---|---|
 Donald Trump | ||
Pennsylvania |  Joe Biden |
Must-know DIY back-to-school hacks for students of all ages
Brit Morin shares her top tips to make back-to-school season easier and cheaper!
DIY guru Brit Morin, the founder and CEO of Brit + Co, shared her favorite back-to-school hacks for any age group on "Good Morning America" today. Read below for her step-by-step instructions and to learn about how to make each project yourself!
It’s that time of the year again — days filled with packing lunches, helping with homework, and keeping track of chores. Scroll on for the low-down for my go-to tips, DIY projects and hacks that will make this busy back-to-school season easier (and cheaper).
Ceramic tile photo display
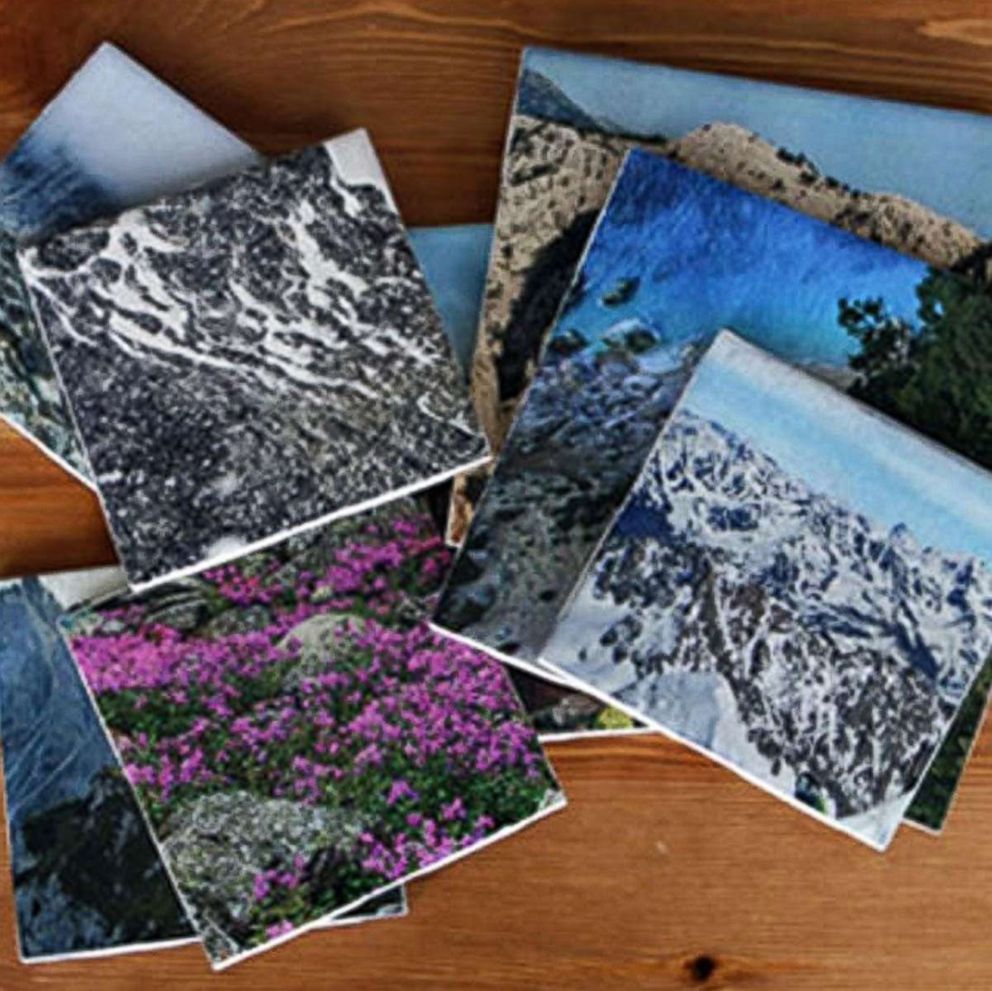
If you're looking for a super fun way to show your summer family vacation memories or your little one's new school portraits, look no further. These are easily one of my favorite ways to display our family photos and they also make great gifts for friends.
Materials:
- Photos printed on photo paper
- Mod podge
- Spray shellac
- X-ACTO knife
- Ceramic tiles
- Cutting mat
- Paint brush
Instructions:
1. Cut your photo so it’s half an inch larger than your tile on all four sides.
2. Brush a thin layer of mod podge on your tile.
3. Press your photo firmly onto the tile.
4. Smooth out air bubbles, and let dry 5 to 10 minutes.
5. Trim excess photo with X-ACTO knife.
6. Seal with a coat of spray shellac.
Get the full DIY tutorial here.
Get our full coverage to head back to school like a boss and own the school year.
DIY Hula Hoop Photo Display
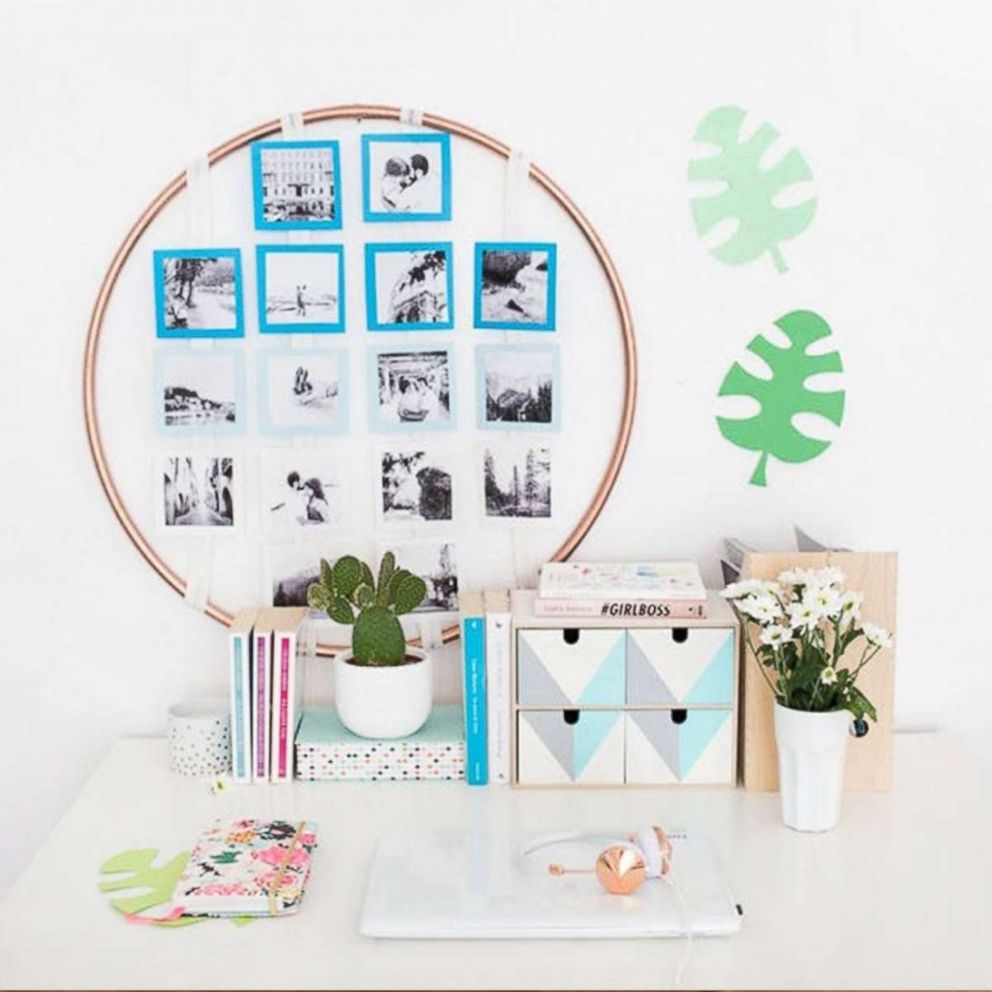
This project is perfect for decorating a dorm space where minimal to no holes are allowed on the walls.
Materials:
- Hula hoop
- Ribbon
- Spray paint (optional)
- Colorful paper
- Hot glue gun
- Washi tape
- Scissors
Instructions:
1. We spray painted our hula hoop a color we liked more than the original one. This step is not necessary if you like the current color of your hula hoop.
2. Cut ribbons to match the size of the hula hoop.
3. Evenly space and hot glue ribbons vertically, from the top to the bottom of the hula hoop.
4. Trim or glue the excess ribbon to the back of the ribbon.
5. Mount photos to paper with washi tape.
6. Hot glue the mounted photos to the ribbon.
Get the full tutorial here.
Update Clothes with Patches
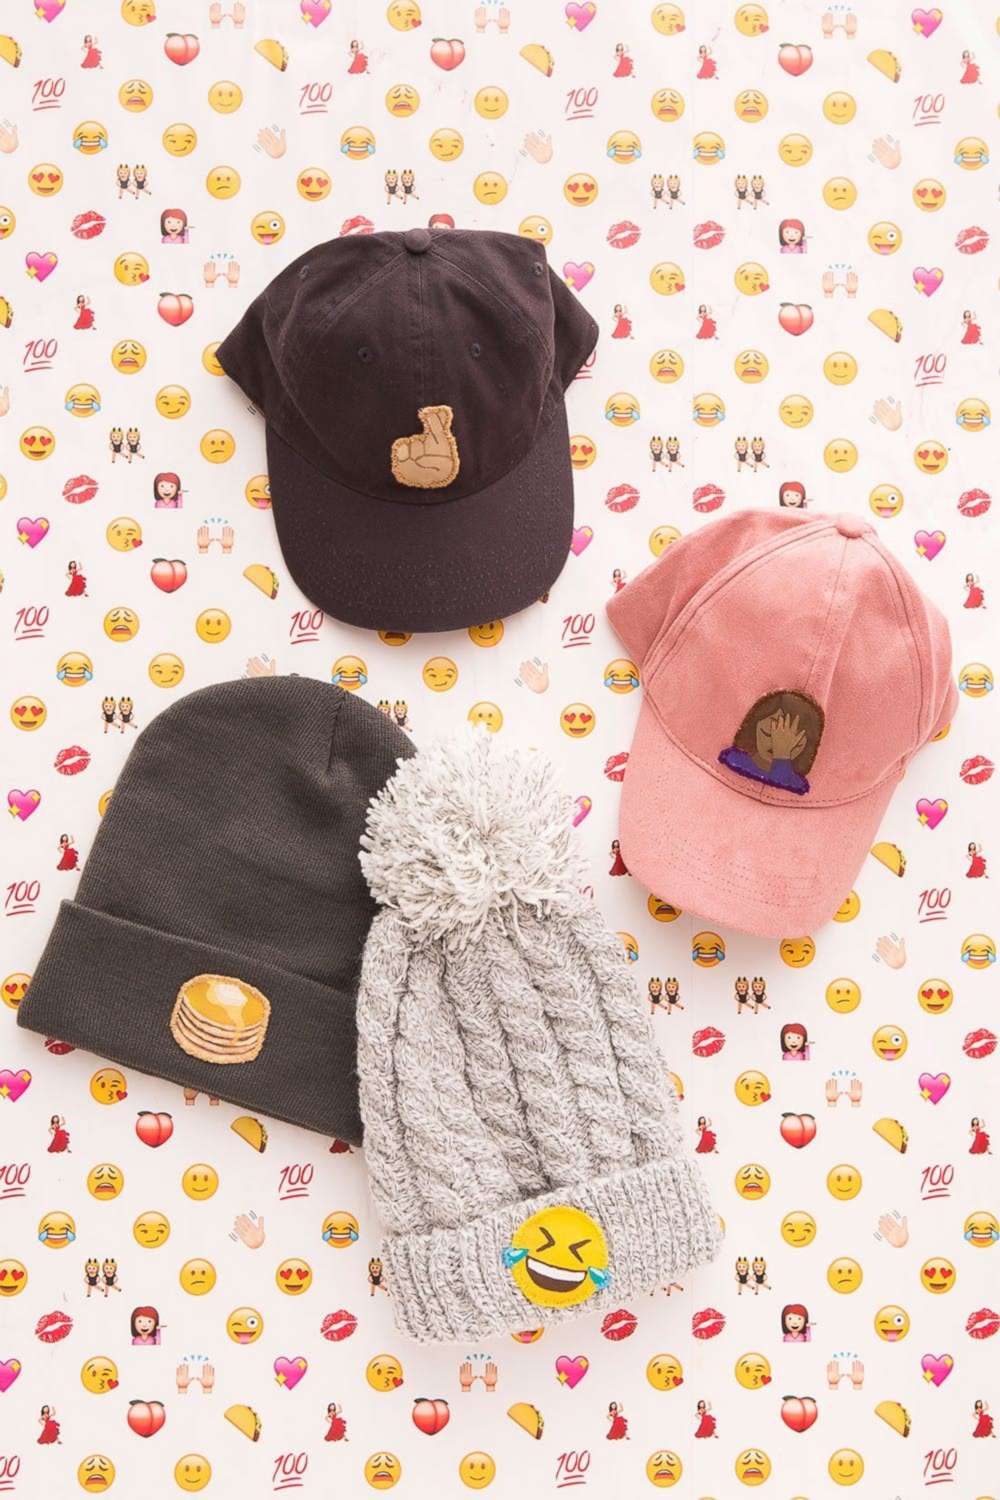
This DIY is great for kids that have hand me downs from siblings. It helps makes their clothes feel special and new to them.
Materials + Tools:
- hat
- canvas
- iron-on transfer paper
- emoji print out (optional)
- acrylic paint
- embroidery floss
- paint brushes
- needle
- iron
- hot glue gun
- scissors
Instructions:
1. Print out your favorite emoji onto iron-on transfer paper. Iron it onto thick nude canvas.
2.Paint on top of your iron-on to create a vibrant patch.
3. Cut out your emoji design and whip stitch the edge.
4. Hot glue onto your hat.
Get the full tutorial here.
Back to School Backpack DIY
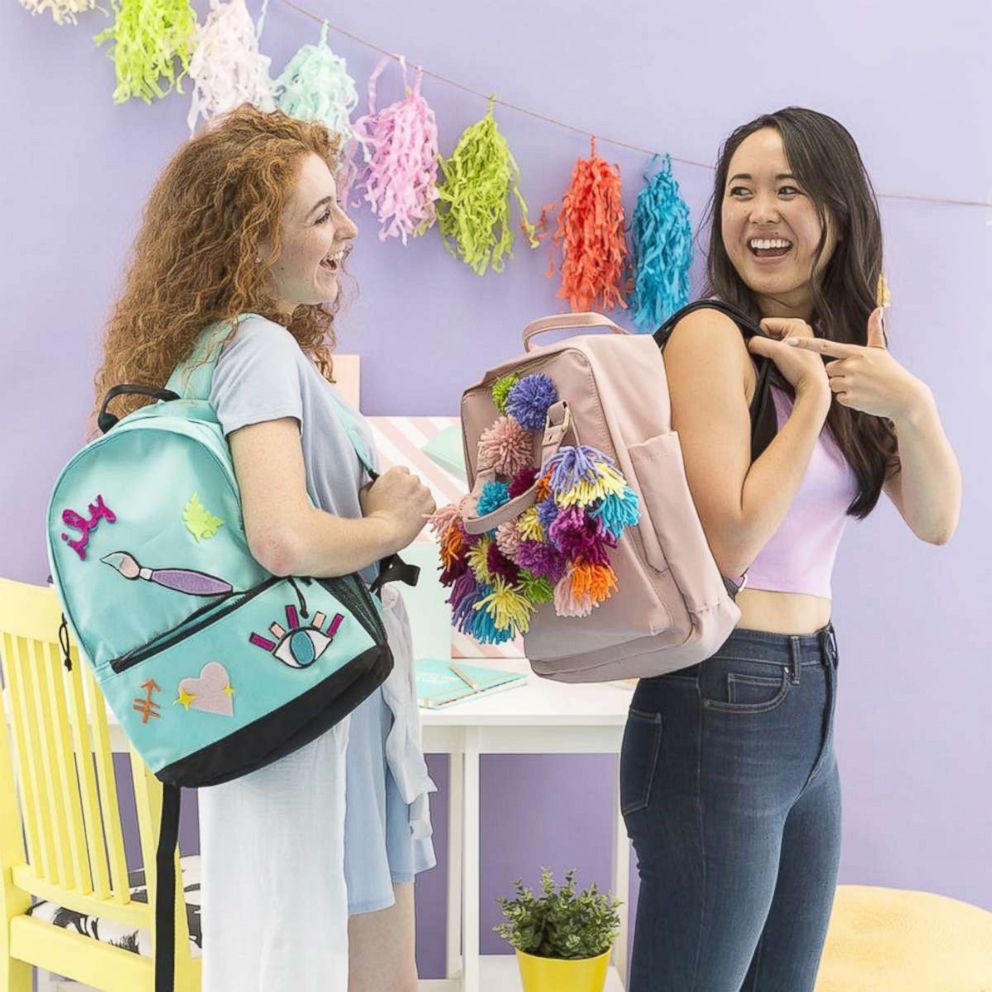
Personalize your backpack with these simple DIY decorations.
Materials and Tools:
- backpack (you can upcycle an old backpack for this!)
- yarn
- felt
- Fabri-tac (or other fabric glue)
- scissors
- Pencil
Instructions:
1. Make poms, check out this tutorial, here.
2. Fabric-tac the poms to the backpacks
Check out the full tutorial here.
DIY Pencil Sneakers
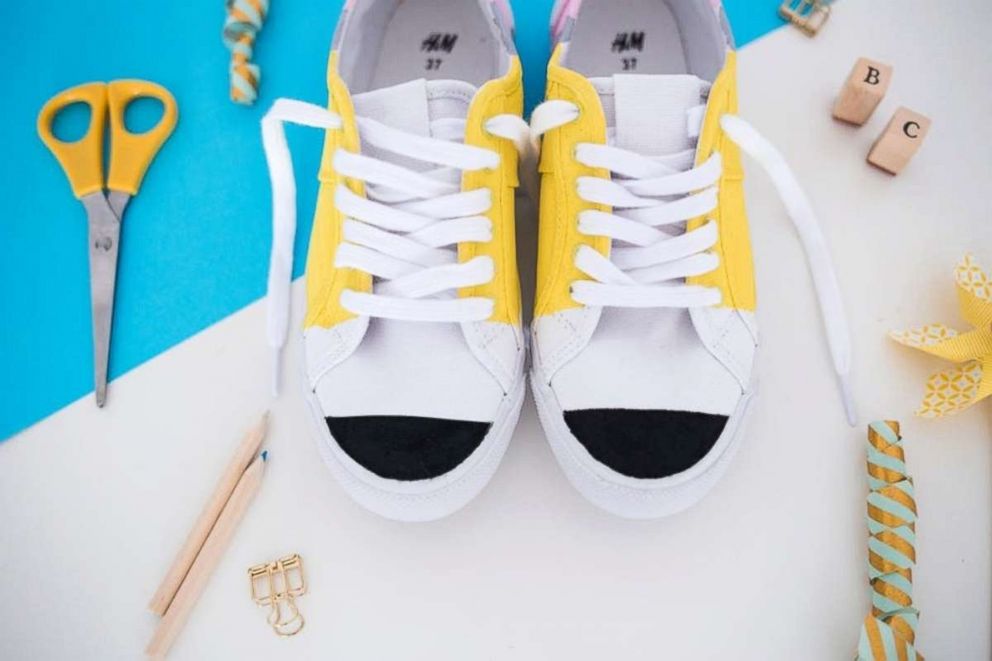
These sneakers are seriously so cute you may want to make a pair for yourself.
Materials and Tools:
- old white sneakers
- fabric paint
- brushes
- masking tape
Instructions:
1. Protect your surface, then take your shoe and place tape across the toe, leaving a few inches exposed.
2. Paint using a dark color for your pencil tip.
3. Remove the shoelaces and use masking tape to section off the body of the pencil. Paint using a yellow color, then let everything completely dry.
4. Paint a gray stripe on the side for the metal. Use masking tape again to be more precise.
5. Once the color is dry, paint the back part of the shoe with a pink color to represent the eraser.
6. Repeat steps on the other shoe.
Get more DIY project on Brit + Co.
Get our full coverage to head back to school like a boss and own the school year.

Top Stories
ABC News Live