DIY Holiday Decorations: 4 Fun and Festive Craft Ideas to Deck the Halls Like a Pro
Spruce up your holiday decor with DIY projects like log reindeer, pipe wreaths.
— -- Want to deck the halls like a pro this season? Spruce up your holiday decor with these fun and creative DIY craft ideas.
Sabrina Soto, host of ABC's "Great Christmas Light Fight" and the creator of Casa and Company, appeared on "Good Morning America" today with her tips to create modern and festive decorations, including a modern pipe wreath, log reindeer, and a joyous marquee sign. (See the step-by-step instructions and materials required below.)
Soto also whipped up an extra DIY project, a wire table tree, which can be the centerpiece at your holiday table or add sparkle to any room in your home. Watch the video and follow the instructions below to make this at home.
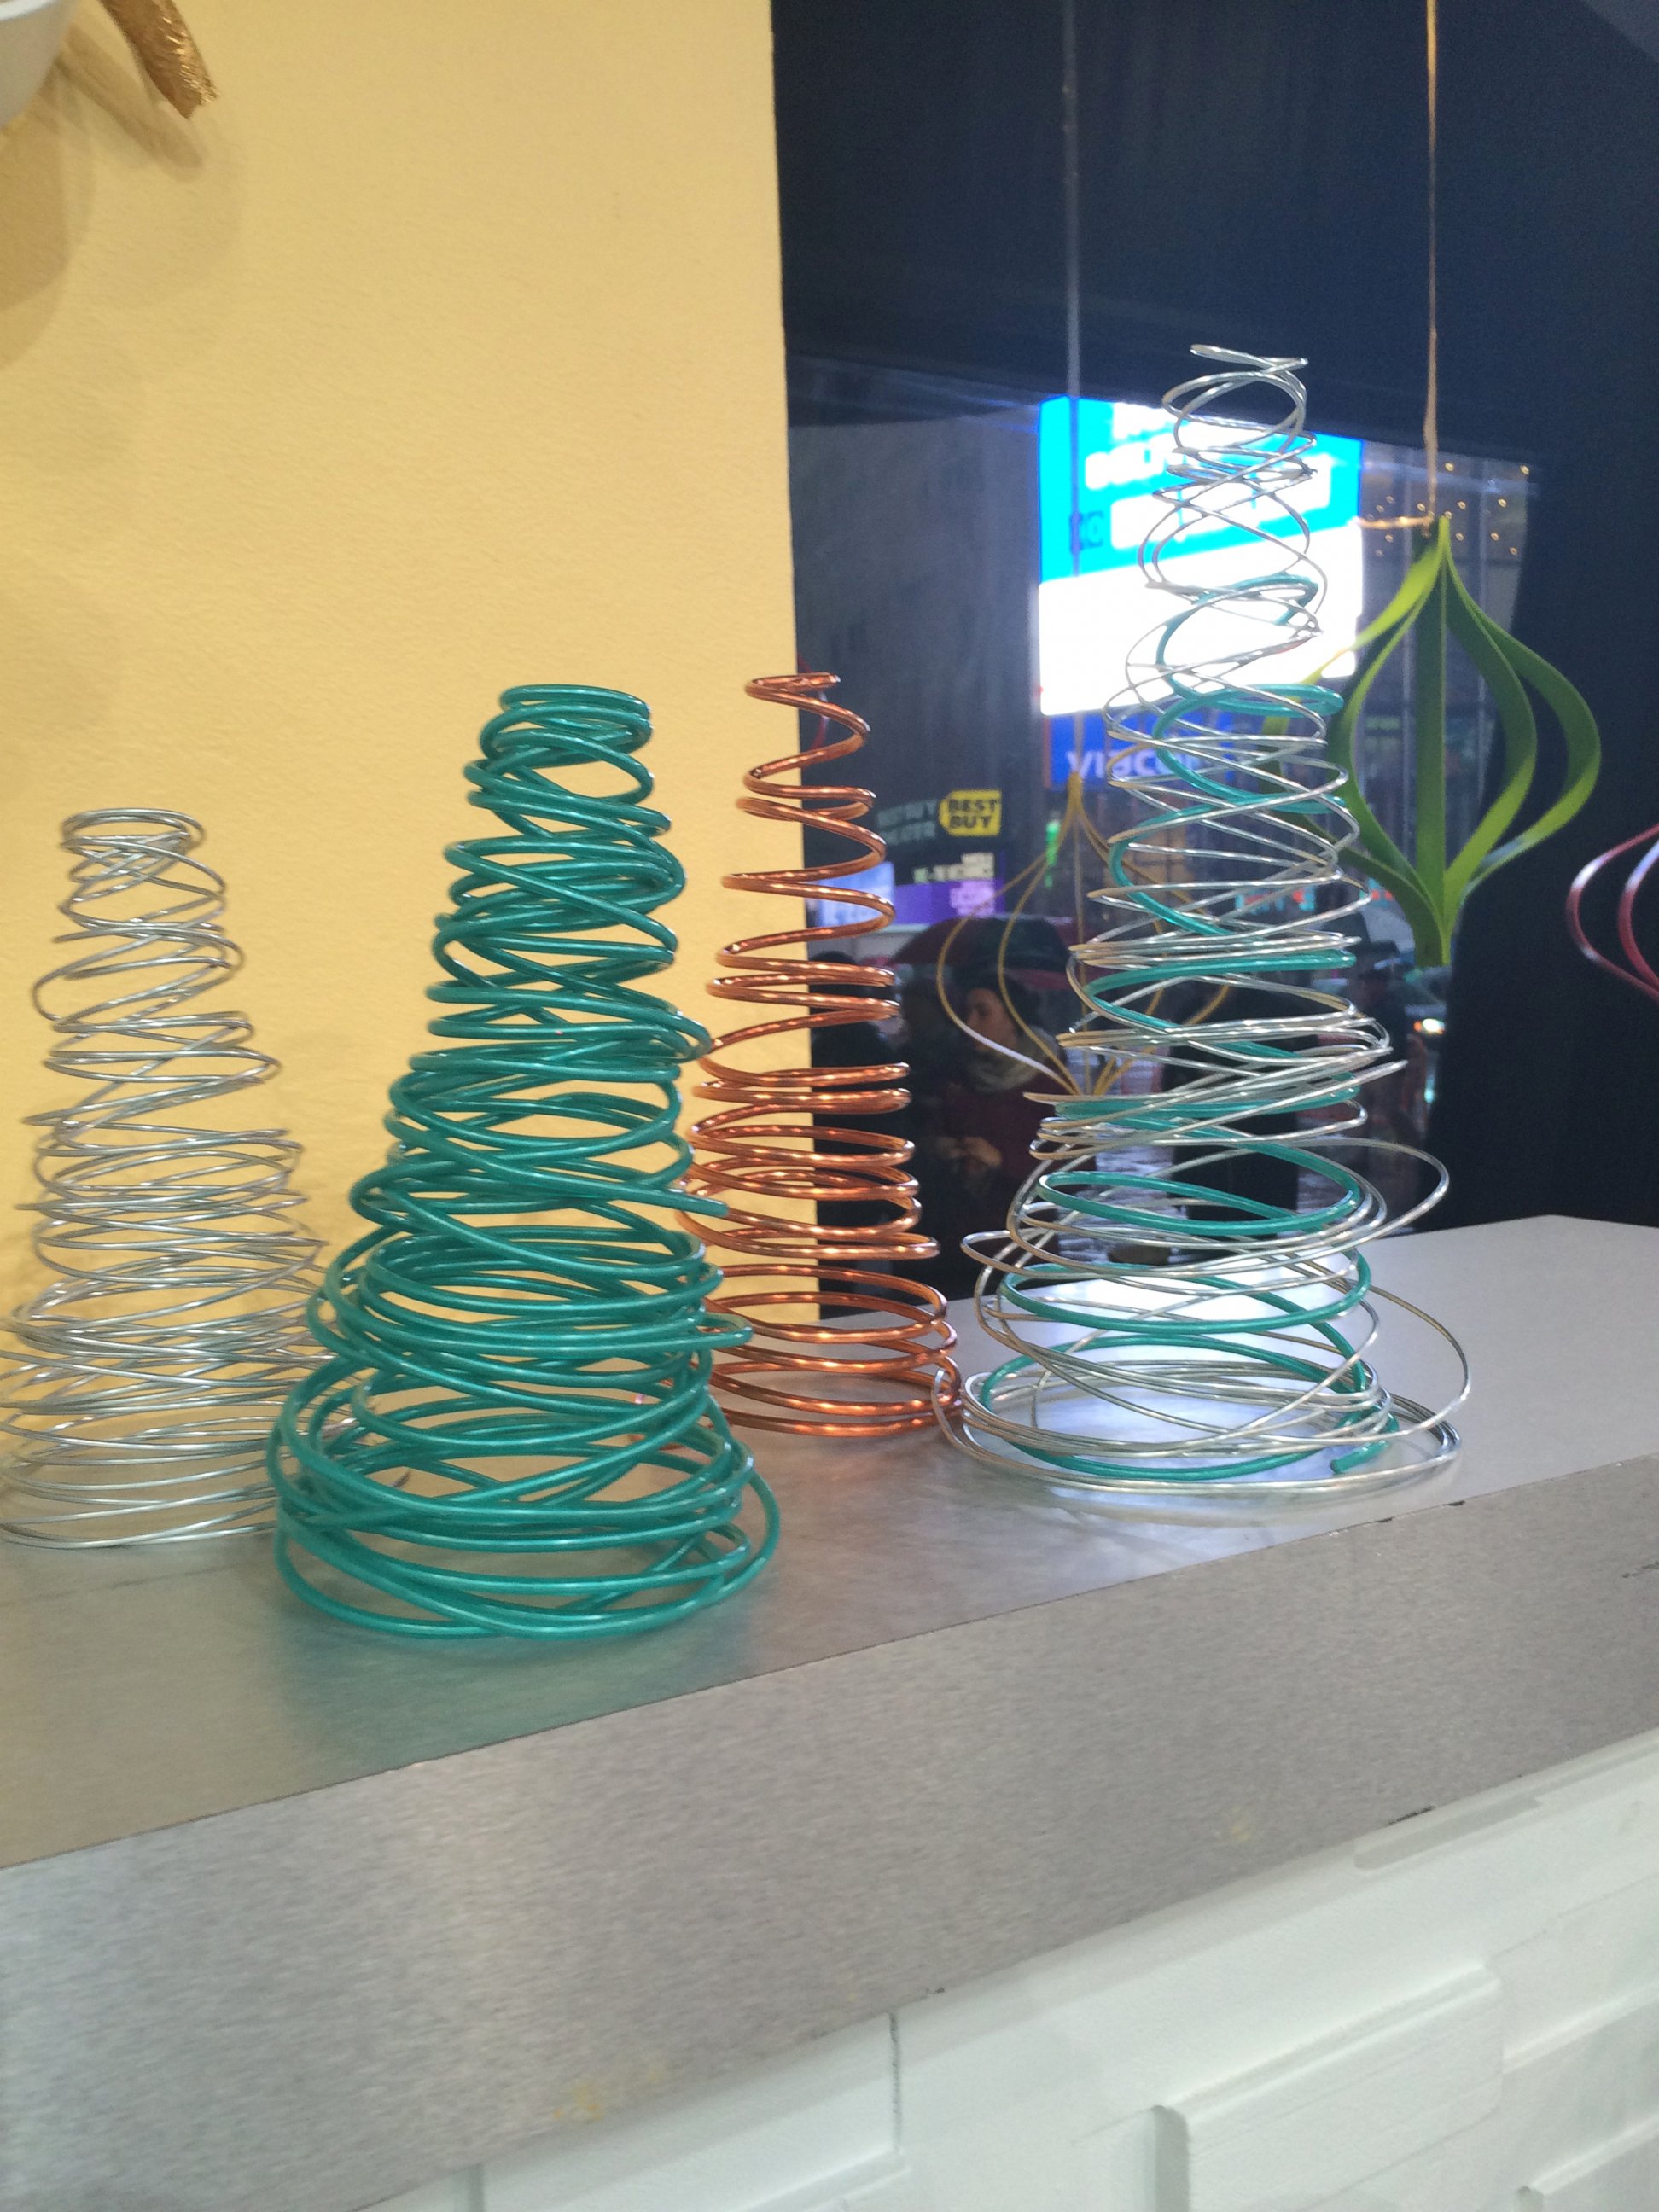
Materials:
Metal wire (colors optional)
Pliers
Foam cones (different sizes)
Instructions:
Cut wire to desired length. Make sure it is long enough to wrap around the cone.
Starting at the base of cone, start wrapping the wire around, working your way to the top.
Once wrapped to your liking, slide the foam cone out.
Fix any loose ends on your wire tree and bend back any sharp edges.
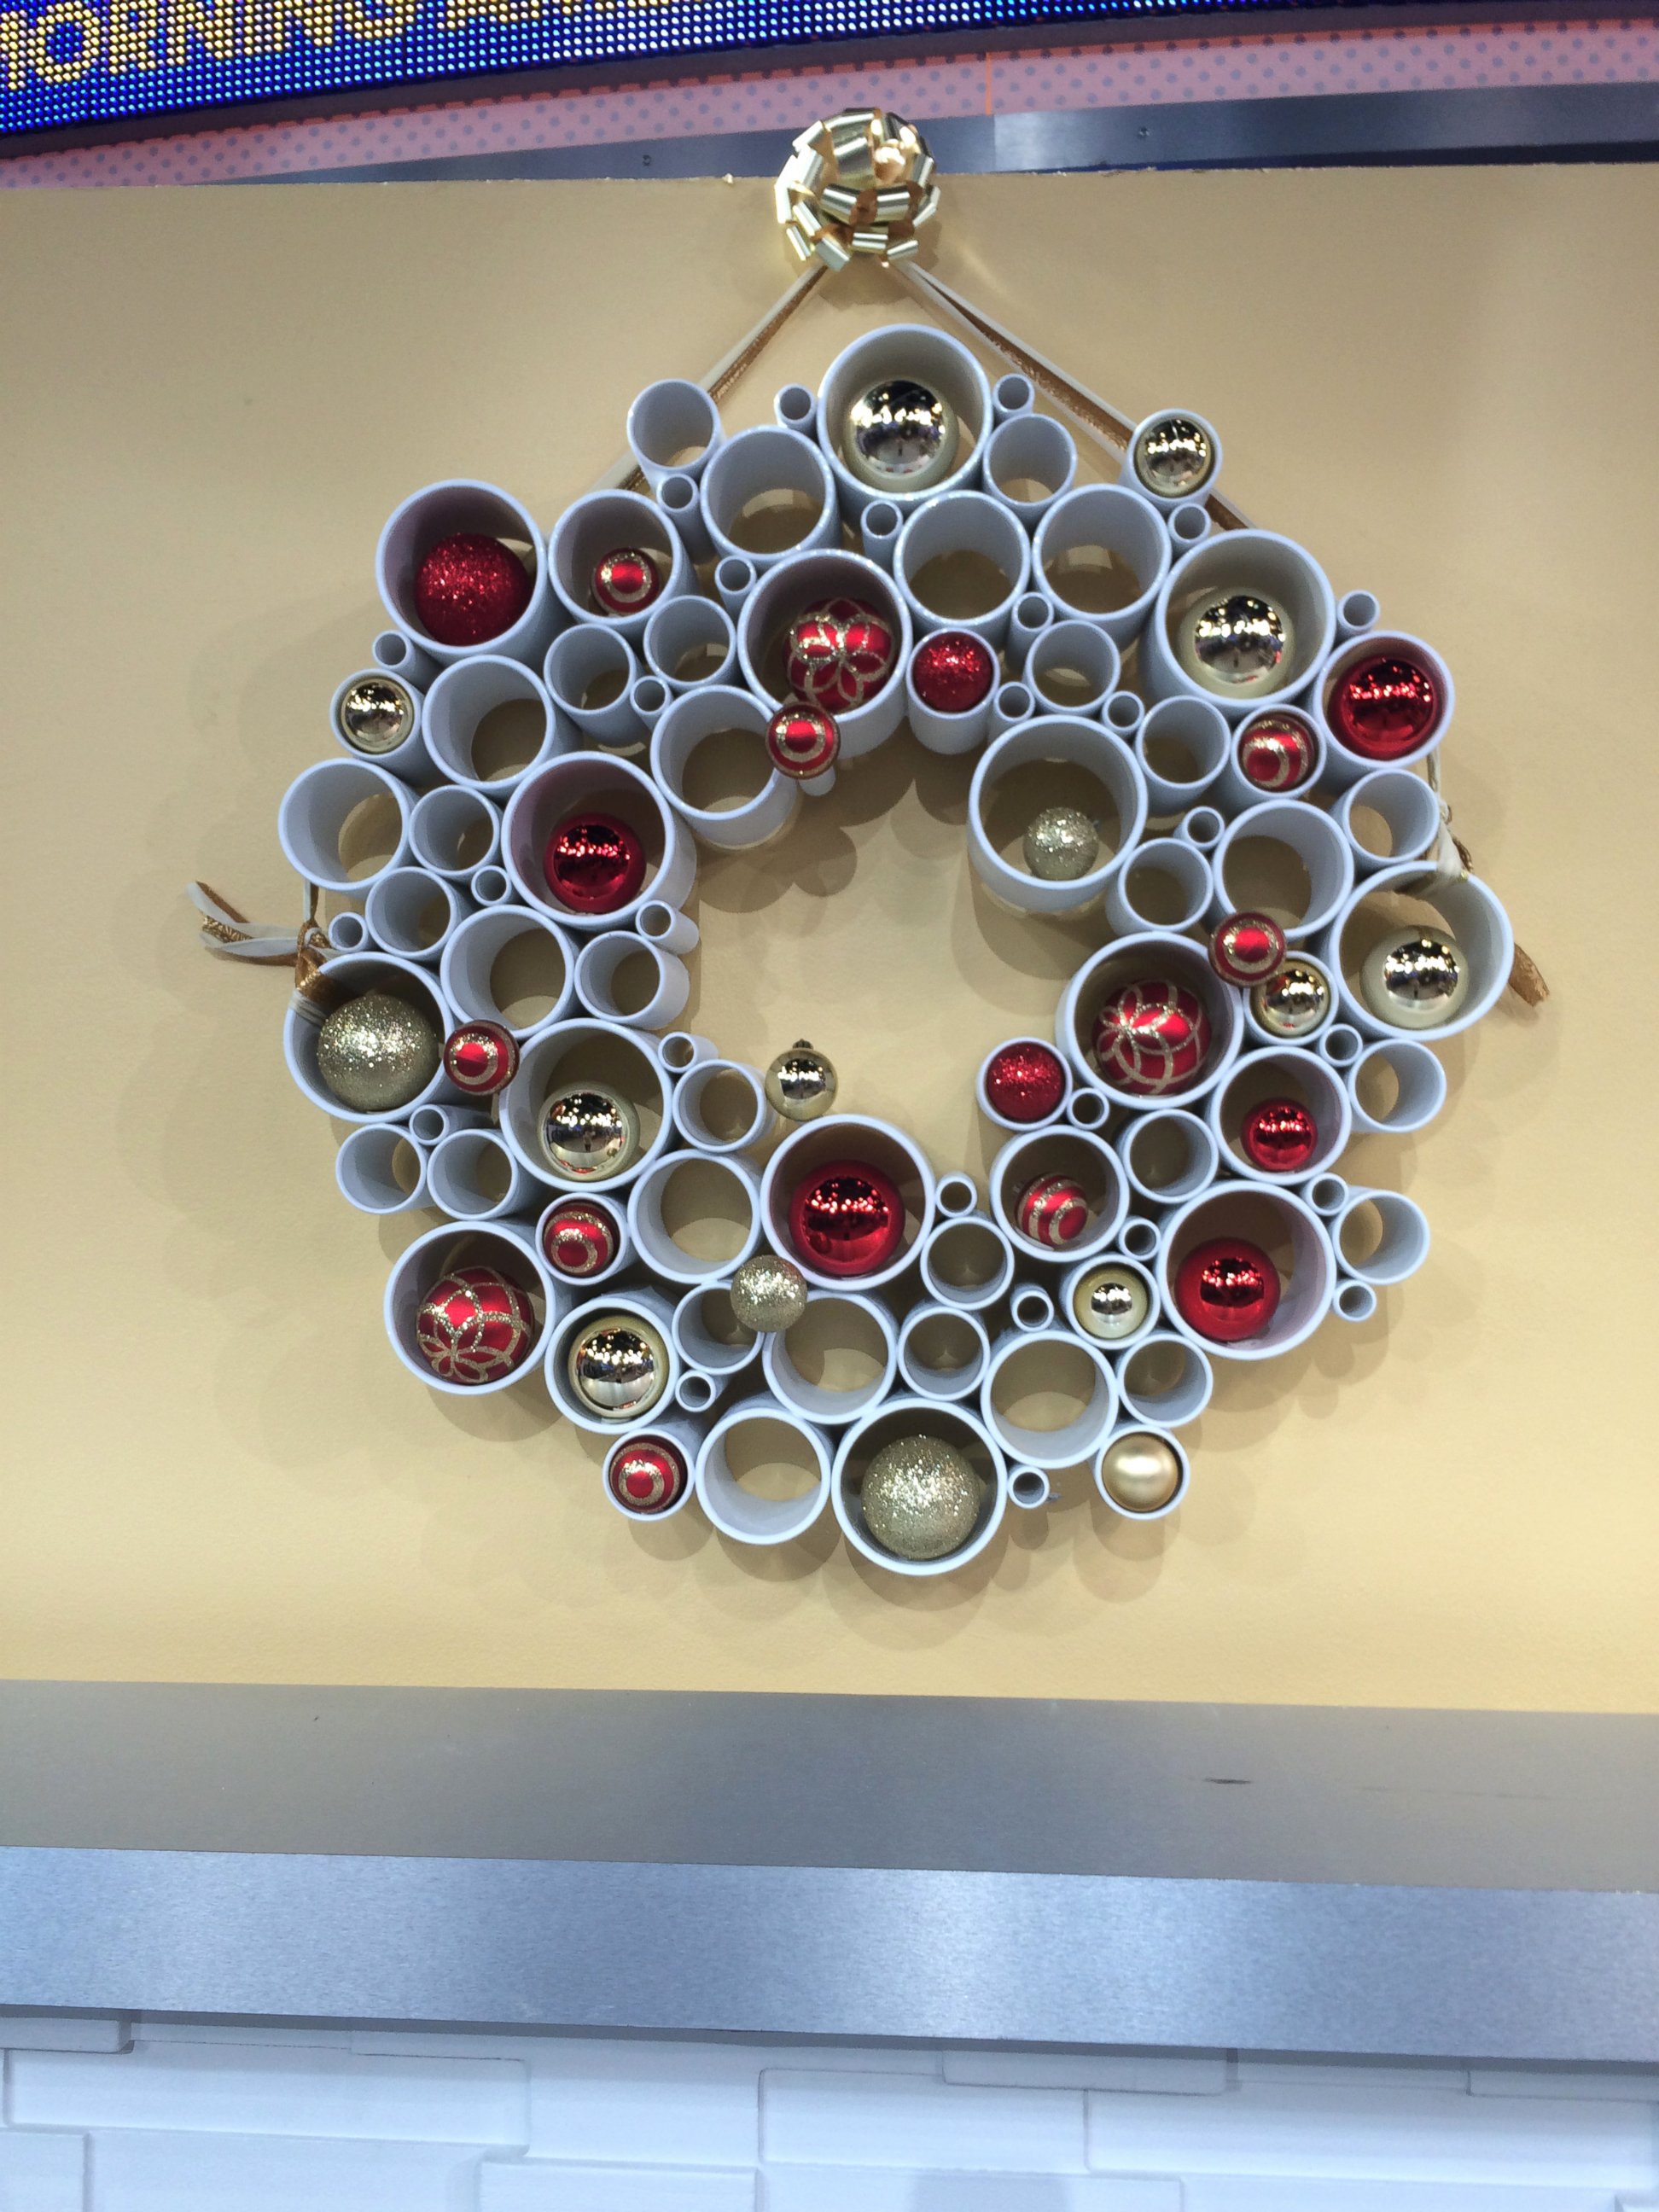
Materials:
PVC pipes in a variety of diameters
PVC cement (16 oz. can)
Spray paint
Sandpaper
Ornaments or decor to place inside the wreath when completed (optional)
Instructions:
Cut the pipes into 5 inch pieces with a table saw or a box saw.
Peel off any stickers, lightly sand edges as needed, and wipe off dirt with a damp cloth.
On a flat surface, lay the pipe pieces out in a pattern with the sizes evenly distributed around the wreath. Use a round object in the center as your guide such as a mixing bowl.
When you are happy with your layout, gently move all but the innermost circle back just a few inches.
Apply PVC cement to the both sides of two of the tubes where they are to be joined. Hold together for 30 seconds and release.
Repeat this process all the way around the circle.
Begin adding the remaining pieces by applying adhesive to both surfaces where any and every joint will be made.
Allow proper drying time (about 2 hours) before continuing.
Turn wreath over and clean the front of your wreath before painting.
Spray paint the wreath following the paint manufacturer’s instructions.
Place ornaments or decor (if desired.)

Materials:
Large wood board (50 x 24 inches)
4 wood planks (2 x 1 inches)
Wood screws
Drill
Indoor Christmas lights
White acrylic paint
Loose gold glitter
Mod Podge
Chipboard letters
Glue
Duct tape
Instructions:
Cut your wood planks into four pieces and use them to frame the outside edge on the back side of your marquee.
Cut your planks into two pieces that are 46 inches long and another two pieces that are 24 inches long.
Use the drill and wood screws to attach the planks in place, keeping the planks flush with the outside edge of the board.
Paint the front and sides of your sign with two coats of white acrylic paint.
Paint the side edges of your chipboard letters with the same paint and allow the paint to dry.
Paint the front of each letter with a coat of Mod Podge and sprinkle loose glitter on the wet glue. Gently brush off any loose glitter.
Arrange your dry letters on your painted board and use a strong glue (like E6000) to glue the letters in place.
Decide where you want the holes for the lights and drill them out.
Push your lights through your holes on the back side and tape each one in place with duct tape.
Plug in your lights.
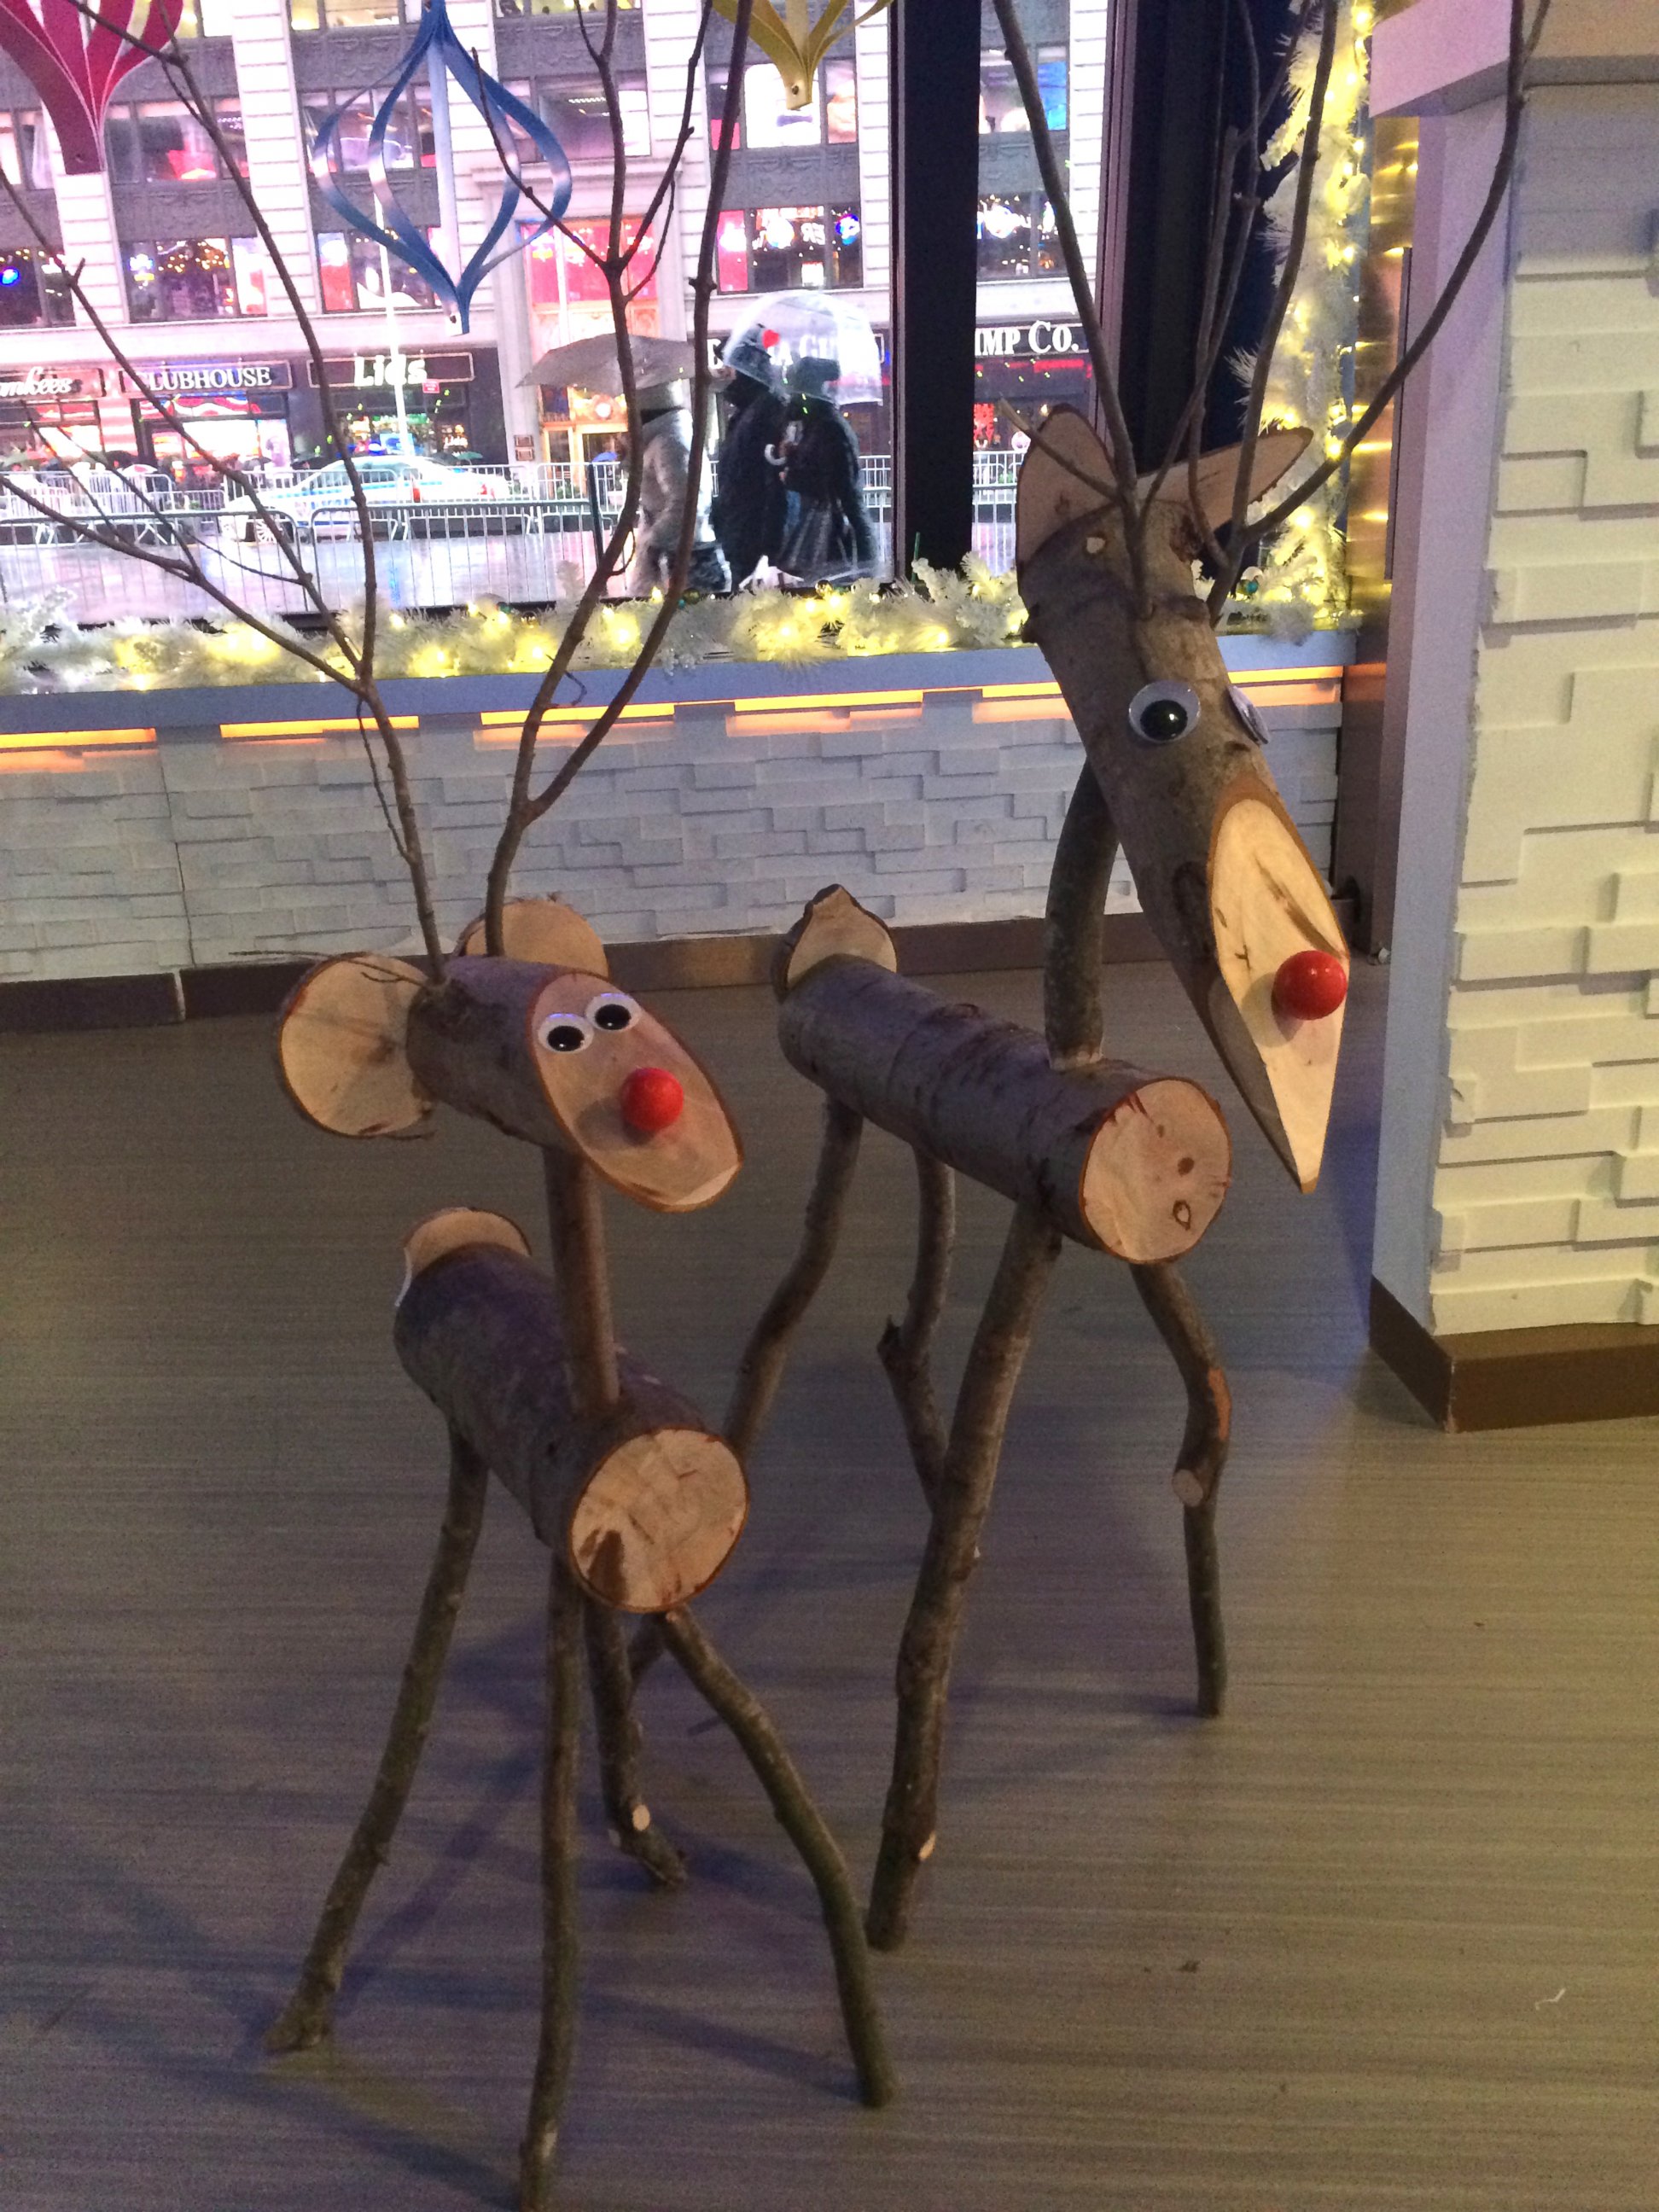
Materials:
Firewood or tree logsShed branchesHandsaw, bow saw, or pruning sawDrill with 1/4-inch to 3/8-inch bitsGogglesChiselKnife for whittlingCarpenter’s wood glueLarge googly eyesPlastic berries or buttons for noseInstructions:
Cut your wood for the body, head and legs using the following dimensions:
-Body: One 12-inch log with 6-inch diameter.-Head: One 4-inch log with 4-inch diameter.-Legs: Four 24-inch branches with 1-inch diameter.-Neck: One 10-inch branch with 2-inch diameter.-Antlers: Two 12-inch branches with 3/4-inch diameter.-Tail: One 8-inch branch with 1/4-inch diameter.Chop away some of the bark from each side of his head to form cheeks.
For the neck, drill a 3/8-inch-diameter hole in the body log at an angle that is slightly forward.
Fit the neck branch into the head hole.
Attach the legs.
Turn the body log over, making sure that the neck is facing straight down, and then drill the 3/8-inch leg holes. The holes should be located about 1 inch from each end of the log and several inches from the centerline. Angle the holes out a little bit.
Drill the four holes the same depth so all four of the reindeer’s legs touch the ground evenly. Stand the reindeer up and level it.
Drill a 3/8-inch-diameter hole in the bottom of the head log an inch from the end of the log. (The angle of the hole will determine the angle of the head.)
Take two small branches and drill holes at the top of the head log, insert the branches to make antlers.
Attach eyes, nose and any other embellishments using glue.

Popular Reads
ABC News Live