Step-By-Step Guide to the Ultimate Snackadium
Let us introduce you to the ultimate Super Bowl food: the snackadium.
Feb. 1, 2016 -- If you’re hosting a Super Bowl party this year and haven’t met the snackadium yet, let us introduce you. Filled to the brim with chips, dips, sandwiches and more, the snackadium is hands down the most epic way to celebrate. And while there is no better way to honor the greatest American food and sports day than with an edible stadium shrine, it’s definitely not a last-minute affair.
Luckily, Heather Arment, founder of A Lil’ Curious, put together a handy how-to guide for those who want to tackle the project. "Once you see something like this, you’re kind of ruined,” Arment said. "How can you just serve your guests nachos and wings after seeing such a gratuitous display of fanaticism?” We’re with you, Heather.
Follow the detailed and easy instructions below to build one for yourself.
Supplies
Building a snackadium is time-consuming enough without completely constructing everything on your own. Simplify the process by pre-purchasing/gathering these materials:
22 cardboard magazine file boxes (available here)
4 Styrofoam blocks (optional)
4 shallow disposable aluminum pans
Cardboard box (at least 24 inches long)
Brown Kraft wrapping paper (available here)
Aluminum foil
Hot or super glue
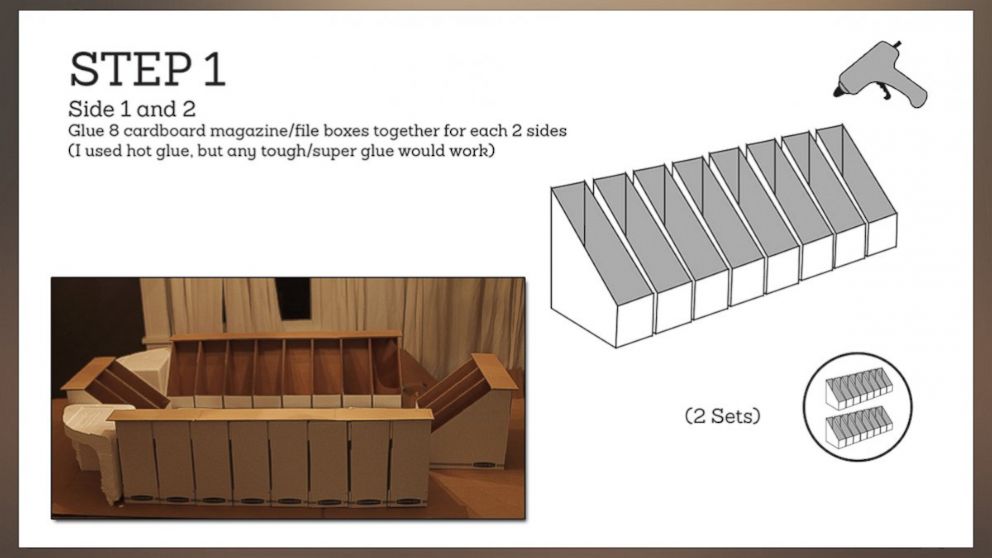
Step 1: Sides 1 and 2
To make the stands, glue two sets of eight file boxes together in a row. Line the insides of each with aluminum foil (so you can reuse other years).
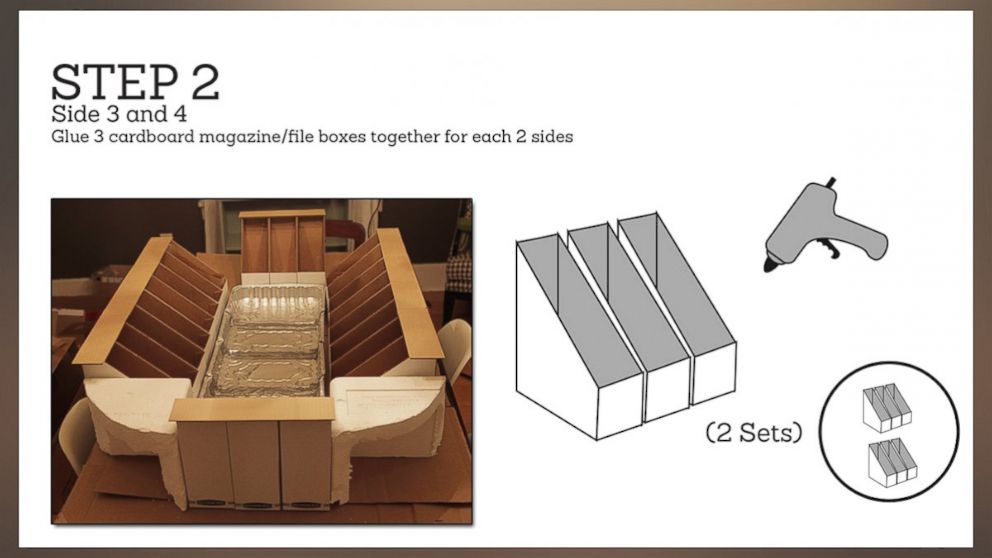
Step 2: Sides 3 and 4
Repeat with two sets of three file boxes for the short sides of the stadium. Line the insides of each with aluminum foil.
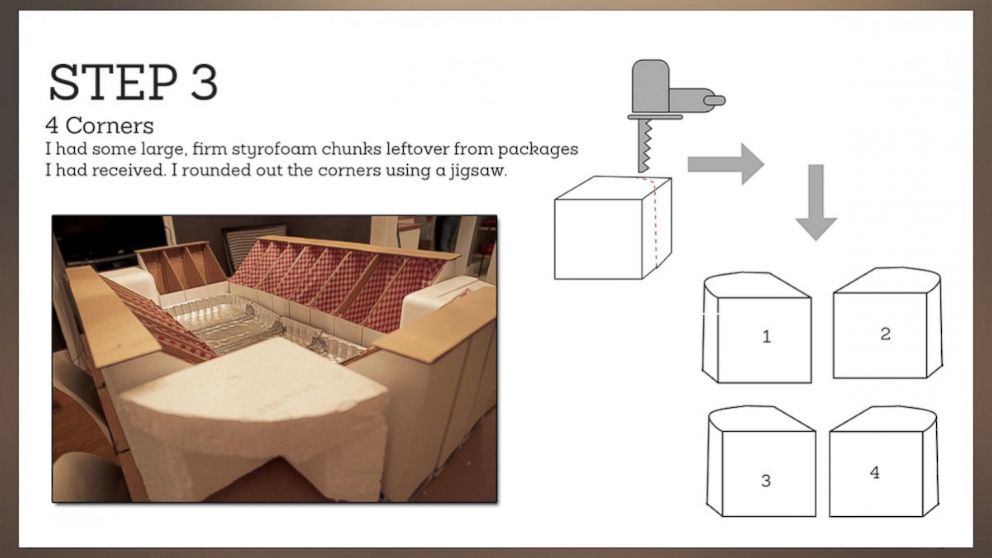
Step 3: Create the Corners
To round out the corners, you can shape Styrofoam. Alternately, try filling out Kraft paper with wads of scrap paper in step 8.
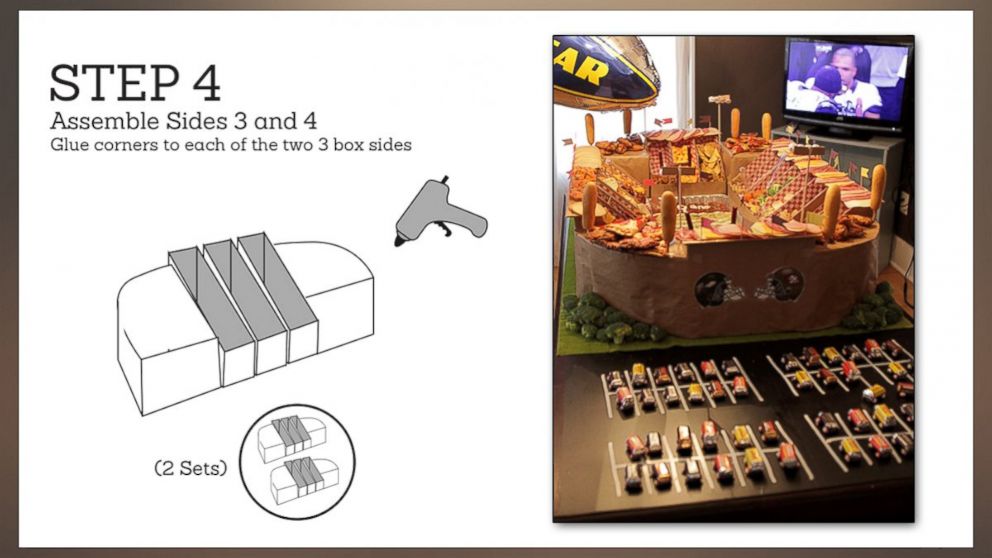
Step 4: Assemble Sides 3 and 4
If you went the Styrofoam route, assemble the short sides by attaching the blocks to the short stands.
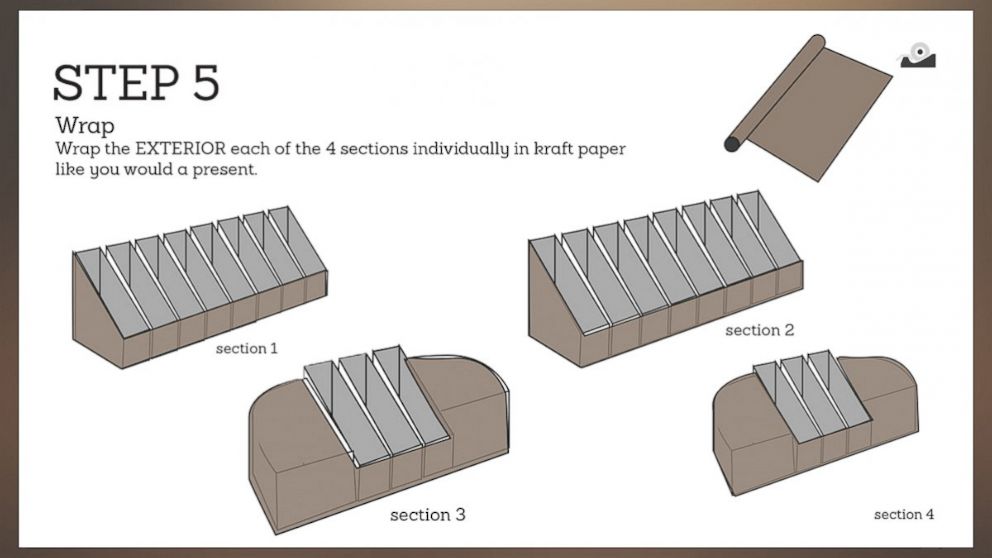
Step 5: Wrap
Wrap each assembled side of the stadium with Kraft paper to make it a uniform color.
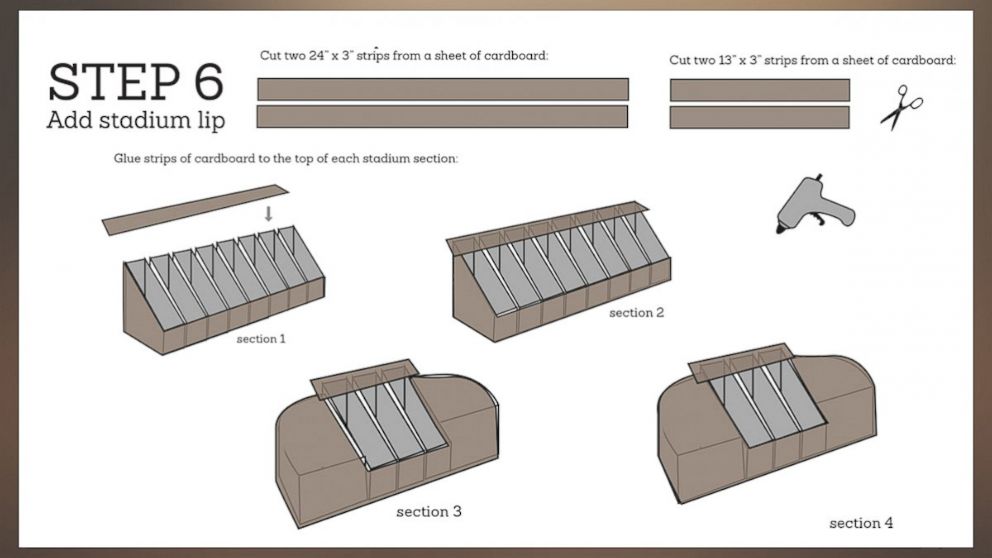
Step 6: Add the Lip
Add the stadium lip by trimming four sheets three inches wide to fit the stands, and glue to attach.
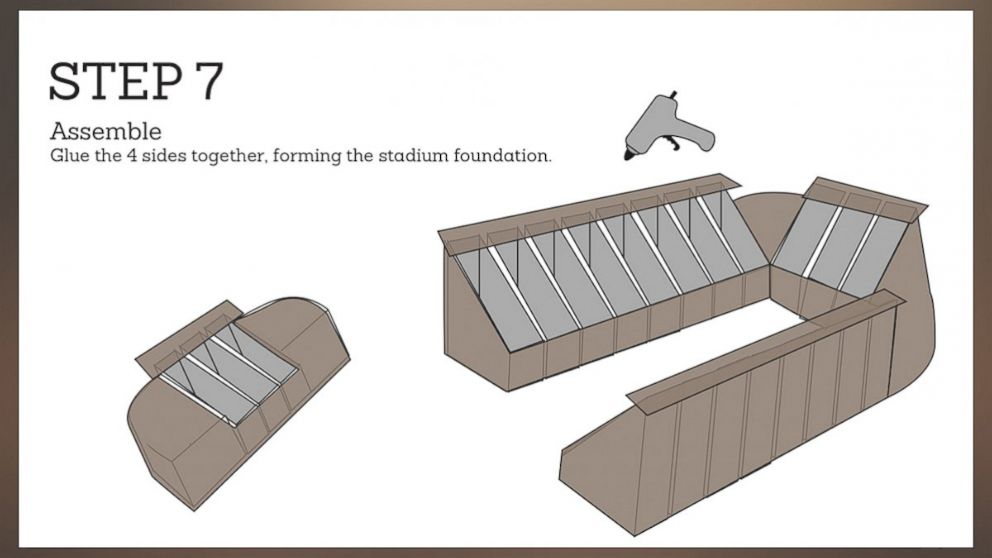
Step 7: Assemble the Foundation
Connect all four sides together to form the stadium foundation.
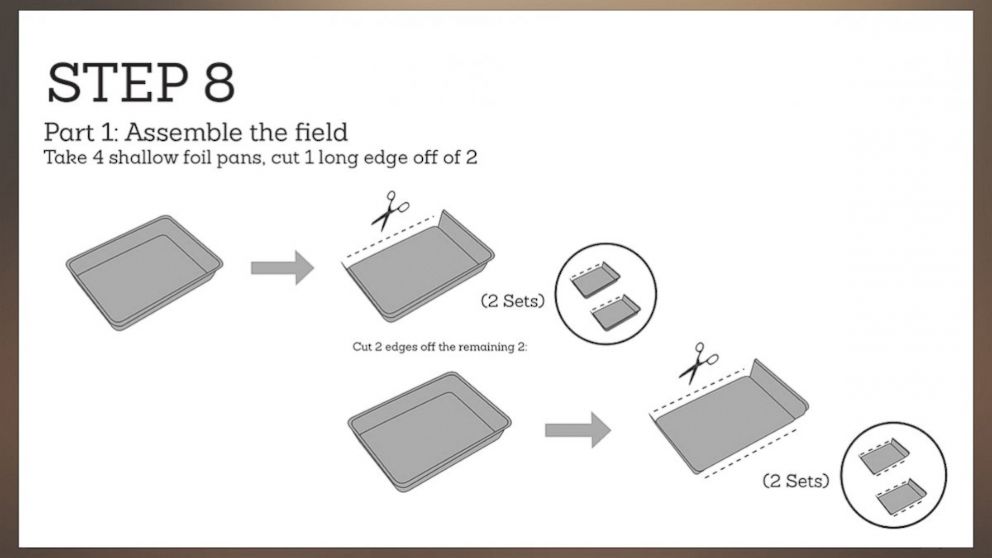
Step 8: Prepare the Field
Cut the long edge of two pans, and cut the long edges off the other two pans.
Step 9: Connect the Field
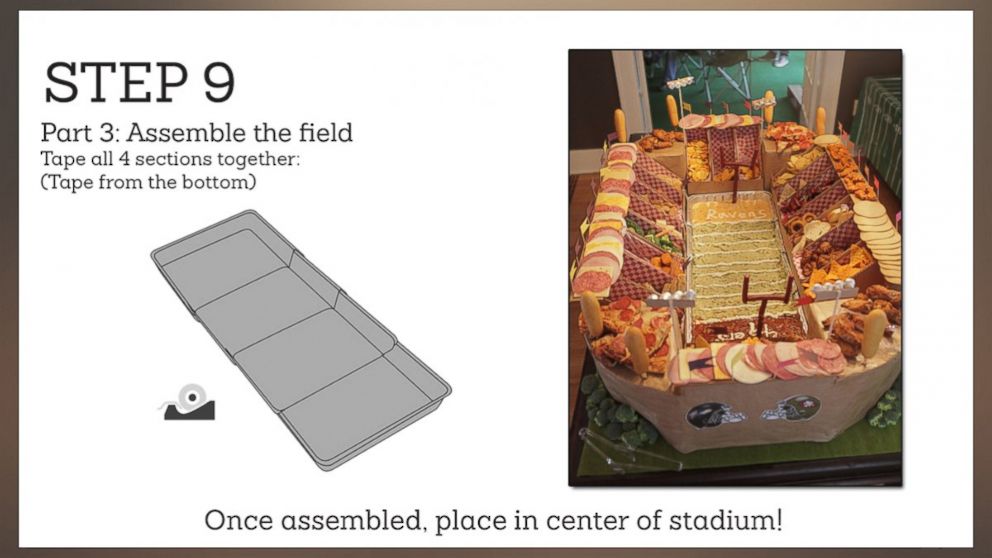
Tape the four pans together to create one long pan. Make sure to tape on the bottom so the food doesn’t touch the tape. Once assembled, place it in the center of the stadium.
Step 10: Fill the Snackadium!
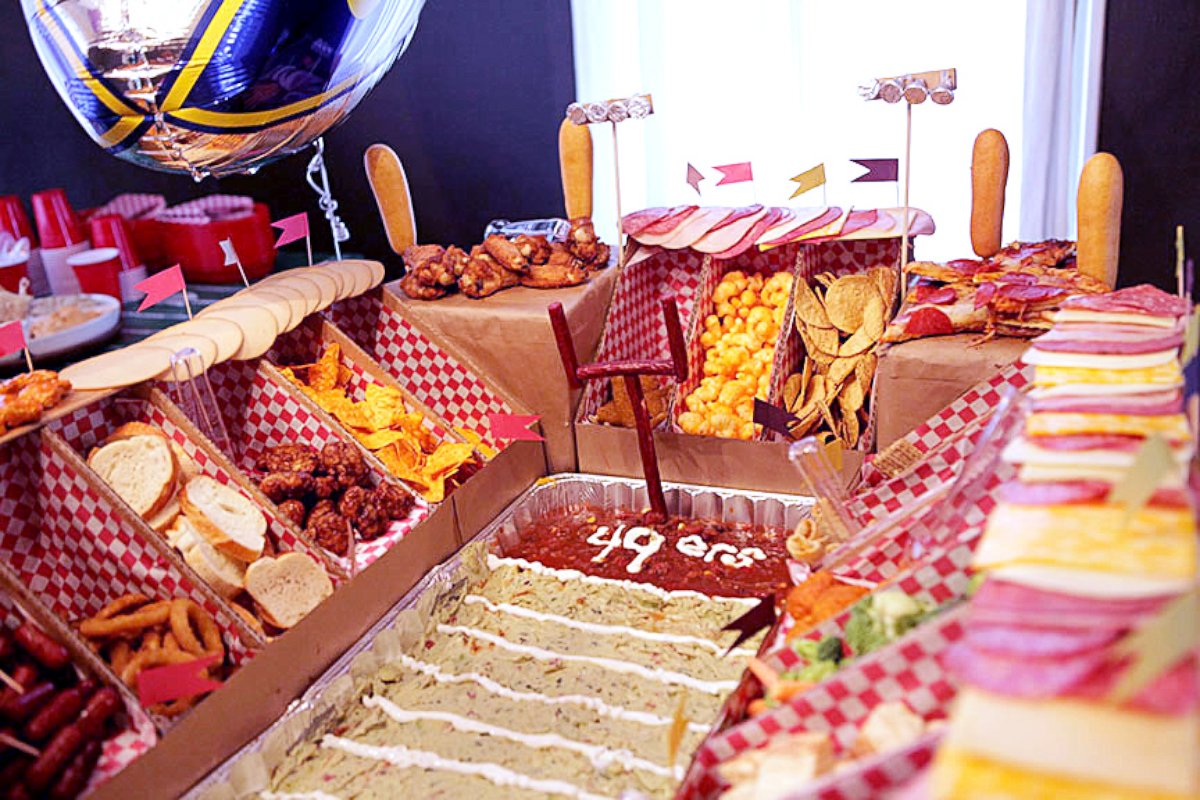
On the field: Fill the bottom with guacamole for the grass, and salsa and cheese dip on either side for the ends zones.
In the stands: Fill the stands with any goodies you like, from chips and pretzels to mini hot dogs and crudité.
On the lip: Sub sandwiches, cheese and charcuterie make for great toppers.
Extras: Decorate the exterior with fun stickers, make stadium posts with Slim Jims and toothpicks, and create yard lines with sour cream piped out of a plastic bag.
Step 11: Tell Your Friends
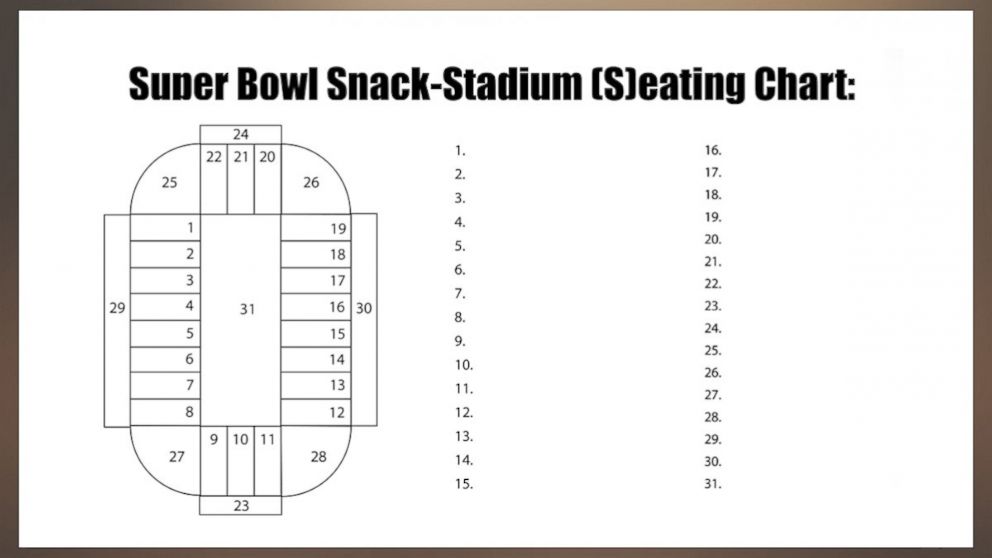
Filling the snackadium yourself can get a little expensive, so a fun way to include your guests is by asking them each to “sponsor” a section. Send out this graphic and have guests claim a section and something to fill it with. That way, they’re included on the day, and you can reduce planning stress.


